Thank you for visiting the AUSTRALIA HP Store
-
Contact Us
CONTACT USCall us
- Sales
- 1300 540 516
- Technical support
- 13 23 47
Exc. public holidays
Chat with us- Our specialist are here to help
- Live Product Demo
- Sales
- 61288061500 (WhatsApp)
-

- Post Sales
- 61288061700(WhatsApp)
Exc. public holidays
Live product demo
Submit feedback We value your opinion! - My Account
Search
NVMe Expansion in HP OMEN Laptops: Slot Layout and Installation Tips

Posted:
October 14, 2025

IMPORTANT NOTICE & DISCLAIMER:
Warranty Warning: Opening your HP OMEN laptop and modifying internal components may void your manufacturer’s warranty. Check your specific warranty terms before proceeding. HP recommends that hardware upgrades be performed by authorised service providers.
Risk of Damage: Improper installation of NVMe drives can result in permanent damage to your laptop, the storage device, or other components. Users proceed at their own risk. HP is not responsible for any damage resulting from user modifications.
Data Loss Warning: Hardware modifications carry the risk of data loss. Always back up all important data before attempting any hardware changes. HP is not responsible for any data loss that may occur.
Safety Precautions: Working with electronic components poses risks including electric shock and electrostatic discharge damage. Always power down completely, disconnect from power sources, and use proper anti-static equipment.
Compatibility: Not all NVMe drives are compatible with all HP OMEN laptop models. Verify compatibility with your specific model before purchasing components. Using incompatible hardware may result in system instability or failure.
Technical Expertise Required: This guide is intended for users comfortable with hardware modifications. If you are unsure about any step, consult with a qualified technician or HP authorised service provider.
Regulatory Compliance: Any modifications must comply with local Australian regulations regarding electronic devices. Modified devices may no longer meet original certification standards.
The information provided is for educational purposes only. HP and HP Tech Takes makes no warranties, express or implied, regarding the accuracy, completeness, or suitability of this information for any particular purpose.
Contents
- Introduction
- Understanding NVMe Storage Technology in HP OMEN Laptops
- HP OMEN Laptop Models and Their NVMe Slot Configurations
- Selecting the Right NVMe SSD for Your HP OMEN Laptop
- Pre-Installation Preparation and Planning
- Step-by-Step NVMe Installation Guide for HP OMEN Laptops
- Post-Installation Setup and Drive Configuration
- Optimising NVMe Performance in HP OMEN Laptops
- Troubleshooting Common Installation Issues
- Storage Maintenance and Best Practices for Long-Term Performance
- Exploring Additional HP OMEN Gaming Solutions
- Conclusion: Maximising Your HP OMEN Laptop’s Potential
Introduction
For Australian gamers and content creators, storage capacity has become a critical concern. Modern AAA games regularly exceed 150 GB in size, whilst high-resolution video projects can quickly consume hundreds of gigabytes. Whether you’re in Sydney editing 4K footage or in Melbourne downloading the latest releases, having adequate storage is essential for maintaining productivity and enjoyment.
HP has designed HP OMEN laptops with upgradeability in mind, allowing users to expand storage capacity with NVMe drives rather than replacing the entire system. This approach not only saves money but also extends the useful life of your investment.
Upgrading storage delivers multiple benefits beyond additional space. You’ll experience dramatically reduced load times, improved system responsiveness, and the ability to maintain larger game libraries without constant deletion and reinstallation. This comprehensive guide covers everything Australian users need to know about NVMe expansion in HP OMEN laptops, including model-specific slot configurations, compatibility requirements, and detailed step-by-step installation procedures.
Safety remains our top priority throughout this process. Remember to ground yourself before touching components, use the correct tools for the job, and handle all parts gently to avoid damage. Following these precautions ensures a successful upgrade without risking your valuable equipment.
Understanding NVMe Storage Technology in HP OMEN Laptops
NVMe (Non-Volatile Memory Express) represents a modern standard for high-speed data transfer in contemporary computing. Rather than relying on outdated connection protocols, NVMe leverages the PCIe lanes built into your laptop’s architecture to move data significantly faster than traditional SATA SSDs. This translates to games loading in seconds rather than minutes and everyday computing tasks feeling noticeably smoother.
NVMe vs SATA SSD: The Performance Gap
The difference between these technologies is substantial and immediately noticeable in real-world use:
SATA SSDs operate through an older interface originally designed for mechanical hard drives. They’re limited to sequential read/write speeds of approximately 500-600 MB/s, which whilst faster than traditional hard drives, represents a significant bottleneck for modern applications.
NVMe SSDs utilise PCIe Gen 4 technology to deliver sequential speeds up to 7,000 MB/s, more than ten times faster than SATA. This dramatic improvement means near-instantaneous application launches, seamless multitasking between demanding programmes, and significantly reduced waiting times during file operations.
PCIe Generations: Understanding Gen 4 and Gen 5
When selecting an NVMe drive for your HP OMEN laptop, you’ll encounter different PCIe generations. Understanding these differences helps you make an informed purchasing decision:
PCIe Gen 4 NVMe represents the sweet spot for most users, offering an excellent balance between performance and affordability. These drives are common in current HP OMEN laptops and deliver speeds around 5,000-7,000 MB/s, which is more than sufficient for gaming and content creation workflows.
PCIe Gen 5 NVMe drives represent cutting-edge technology, delivering approximately twice the performance of Gen 4 drives with speeds reaching 10,000-14,000 MB/s. However, they require the latest chipsets, generate considerably more heat requiring advanced cooling solutions, and currently command premium prices. For most Australian users, Gen 4 drives offer better value whilst still providing exceptional performance.
Form Factors: Choosing the Right Physical Size
NVMe drives come in different physical sizes, designated by four-digit numbers representing their dimensions in millimetres:
M.2 2280: The standard full-length NVMe SSD measuring 22mm wide by 80mm long. This format is used in most HP OMEN systems and offers the widest selection of drives at various price points.
M.2 2230: Shorter drives measuring 22mm wide by 30mm long. These compact drives are ideal for slim models and secondary slots in certain configurations.
Verifying which form factor your specific model requires before purchasing prevents compatibility issues and unnecessary returns.
HP OMEN Laptop Models and Their NVMe Slot Configurations
Different HP OMEN models feature varying storage expansion capabilities. Understanding your specific model’s configuration ensures you purchase compatible components and maximise your upgrade potential.
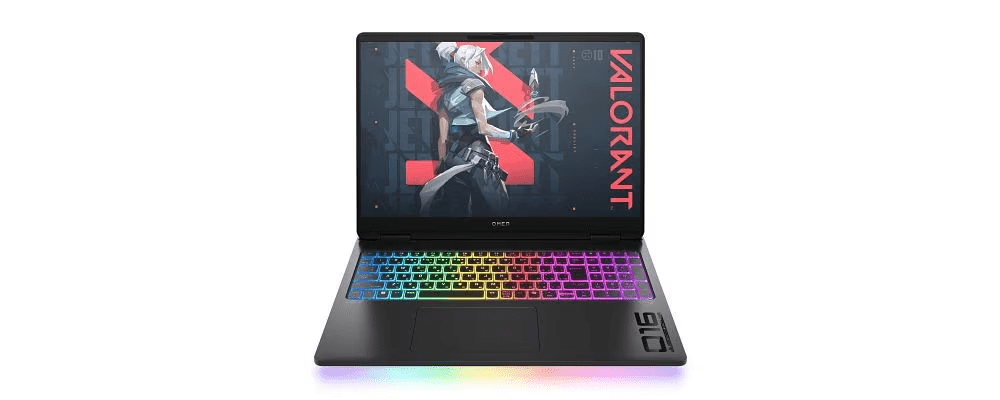
HP OMEN 16 Gaming Laptop
The HP OMEN 16 Gaming Laptop ships with one pre-installed NVMe SSD and typically includes an additional M.2 slot available for expansion, usually supporting the 2280 format. Each slot can accommodate drives up to 2 TB in capacity, allowing for substantial storage expansion. Some higher-tier configurations may ship with both slots populated, so checking your current configuration before purchasing expansion drives is essential.
The HP OMEN 16 represents an excellent choice for gamers who want room to grow their storage capacity without immediately requiring maximum expansion. The dual-slot configuration provides flexibility to add storage as your library expands or your budget allows.
HP OMEN 17 Gaming Laptop
The HP OMEN 17 Gaming Laptop benefits from its larger chassis, which accommodates enhanced storage capabilities. This model is an ideal choice for gamers who prefer maintaining separate drives for operating system files and game installations, as it offers two M.2 slots that support both RAID configurations and independent dual-drive setups.
The additional space in the 17-inch chassis also provides better thermal management for NVMe drives, which can generate significant heat under sustained load. This makes the HP OMEN 17 particularly well-suited for content creators working with large video files or gamers who maintain extensive libraries of modern AAA titles.
Model-Specific Storage Considerations
Each HP OMEN model may have specific requirements or limitations regarding NVMe expansion. Factors to consider include maximum supported capacity per slot, PCIe generation support, and physical clearance for thermal solutions.
If you’re uncertain about your exact model’s specifications, visit the HP Support page to confirm your model number, slot layout, and maximum supported capacity before purchasing a drive. This verification step prevents compatibility issues and ensures you’re investing in appropriate hardware for your system.
Selecting the Right NVMe SSD for Your HP OMEN Laptop
Choosing an appropriate NVMe drive involves considering multiple factors beyond simple capacity. Making an informed decision ensures optimal performance and value for your investment.
Critical Compatibility Factors
Interface Verification: Confirm the drive uses NVMe PCIe protocol, not SATA M.2. Whilst both use the M.2 form factor, they’re not interchangeable. SATA M.2 drives will not deliver the performance benefits you’re seeking and may not be compatible with NVMe-only slots.
Form Factor Matching: M.2 2280 remains the standard for primary expansion slots in most HP OMEN laptops. Verify your specific model’s requirements before purchasing to avoid ordering incompatible hardware.
Capacity Planning: Modern AAA games have grown substantially in size. Titles like Microsoft Flight Simulator or Call of Duty can each exceed 150 GB. We recommend a minimum upgrade of 1 TB, with 2 TB representing the sweet spot for serious gamers who want to maintain multiple current titles installed simultaneously.
Performance Tier Selection
PCIe Generation: A Gen 4 drive provides an excellent balance of speed and value, making it the optimal choice for gaming and content creation. Gen 5 drives offer cutting-edge performance and future-proofing but currently command premium prices that may not justify the modest real-world benefits for most users.
Budget vs Premium Considerations: Budget drives may exhibit performance bottlenecks during sustained operations and typically feature shorter warranty periods. Mid-range drives from reliable manufacturers offer consistent performance across various workloads. Premium drives deliver marginally faster speeds that benefit specialised professional workflows but may not provide noticeable improvements for gaming.
Additional Selection Criteria
Consider drives with built-in thermal management solutions such as heat spreaders or compatibility with thermal pads. Australian summer temperatures can be quite high, and proper thermal management ensures sustained performance without throttling.
Research the manufacturer’s warranty terms and local Australian support options. Reputable brands typically offer warranties ranging from three to five years, providing peace of mind for your investment.
Pre-Installation Preparation and Planning
Proper preparation significantly increases the likelihood of a successful upgrade whilst minimising risks to your system and data.
Essential Tools and Equipment
Precision Screwdriver Set: You’ll need a Phillips head screwdriver with various bit sizes to access your laptop’s internal compartment. Using the correct size prevents stripping screw heads.
Anti-Static Wrist Strap: This inexpensive accessory grounds you to prevent electrostatic discharge that could damage sensitive electronic components. If unavailable, regularly touch a grounded metal object whilst working.
Plastic Prying Tools: These help separate the bottom panel without scratching or damaging the laptop’s finish. Avoid using metal tools that could cause cosmetic damage or short electrical connections.
Critical Data Protection Steps
Complete System Backup: Before attempting any hardware modifications, create a full backup of your system drive to an external hard drive or cloud storage service. This ensures you can recover all data if something goes wrong during the installation process.
Create Recovery Media: Download and create Windows recovery media using Microsoft’s Media Creation Tool. Store this on a USB drive separate from your system. In rare cases where a reinstall becomes necessary, having recovery media readily available saves considerable time and frustration.
Download Latest Drivers: Visit the HP Support website and download the latest chipset drivers, BIOS updates, and storage controller drivers for your specific model. Having these files ready ensures smooth post-installation configuration.
Static Electricity Precautions
Static electricity poses a genuine threat to electronic components. Always ground yourself before touching internal components by either wearing an anti-static wrist strap or regularly touching a grounded metal object. Work on a non-carpeted surface in a room with moderate humidity if possible, as dry conditions increase static buildup.
Avoid wearing synthetic fabrics whilst working on your laptop, as these materials generate static electricity more readily than natural fibres. Handle the NVMe drive only by its edges, never touching the gold contacts or electronic components directly.
Step-by-Step NVMe Installation Guide for HP OMEN Laptops
Follow these detailed instructions carefully to ensure a successful installation without damaging your laptop or the new drive.
Step 1: Power Down and Prepare Your Workspace
Completely shut down your HP OMEN laptop through the Windows Start menu. Do not use sleep or hibernate modes, as these maintain power to certain components. Once shut down, unplug the power adapter and disconnect all external devices including mouse, external displays, and USB peripherals.
If your laptop has a removable battery, remove it now. Most modern HP OMEN laptops feature internal batteries that cannot be easily removed, so simply ensuring the system is powered off suffices.
Place your laptop on a clean, flat surface with adequate lighting. Gather all required tools within easy reach before proceeding.
Step 2: Access the Internal Compartment
Turn your laptop over to expose the bottom panel. Identify all screws securing the panel, noting that some models feature screws of different lengths in specific positions. Take a photo with your smartphone to reference during reassembly if needed.
Remove all securing screws, being aware that some HP OMEN models use captive screws that remain attached to the panel rather than coming out completely. Store removed screws in a small container to prevent loss.
Carefully separate the bottom panel using plastic prying tools. Start at a corner and work your way around the edges, listening for the clips to release. Never force the panel, as excessive pressure can crack the plastic or damage internal components.
Step 3: Locate the Empty M.2 Slot
With the bottom panel removed, identify the empty M.2 slot. It will appear as a connector with a mounting hole beyond it, typically covered by a protective label or thermal pad. The slot may be positioned near the battery, cooling system, or along the motherboard edge depending on your model.
Remove any protective labels or thermal pads covering the slot, being careful not to damage surrounding components. If a thermal pad is present, set it aside for reuse during reassembly.
Step 4: Insert the NVMe Drive
Hold your new NVMe drive by its edges, avoiding contact with the gold connector pins or any surface-mounted components. Align the drive’s notch with the key in the M.2 slot to ensure correct orientation.
Insert the drive into the slot at approximately a 30-degree angle, applying gentle but firm pressure until the gold contacts are fully seated in the connector. The drive should slide in smoothly without requiring excessive force. If you encounter resistance, remove the drive and verify correct alignment before trying again.
Once fully inserted, the drive will sit at an angle above the motherboard. Gently press the opposite end down towards the mounting hole until it lies flat, then secure it with the provided mounting screw. Do not overtighten the screw, as this can warp the drive’s circuit board.
Step 5: Apply Thermal Management Solutions
If your HP OMEN laptop included a thermal pad for the expansion slot, carefully position it over the installed drive. These pads transfer heat from the drive to the laptop’s bottom panel, improving cooling performance.
Some aftermarket NVMe drives include their own heat spreaders or thermal pads. If your new drive has these features, ensure they don’t interfere with the laptop’s bottom panel when reassembled. Remove any excessive material if necessary to maintain proper clearance.
Step 6: Reassemble Your Laptop
Replace the bottom panel by aligning it with the laptop’s chassis and pressing gently around the edges until all clips engage. You should hear subtle clicking sounds as the clips snap into place.
Replace all screws in their original positions, tightening them evenly in a crosswise pattern rather than tightening one completely before moving to the next. This ensures even pressure distribution and prevents warping the panel.
Reconnect the power adapter and any essential peripherals before powering on the system.
Post-Installation Setup and Drive Configuration
After successfully installing your new NVMe drive, several configuration steps ensure it functions correctly and delivers optimal performance.
Step 1: Verify BIOS Detection
Power on your HP OMEN laptop and immediately press F10 repeatedly to enter the BIOS/UEFI settings. Navigation methods vary slightly between models, but typically arrow keys move between options and Enter selects them.
Navigate to the storage or system configuration section. You should see your new NVMe drive listed alongside your existing storage devices. The listing will include the drive’s model number and capacity, confirming proper detection.
If the drive doesn’t appear, power down completely, open the laptop again, and verify the drive is fully seated in the slot. Sometimes drives require reseating to establish proper electrical contact.
Step 2: Initialise the Drive in Windows
Once Windows loads, press Windows key + X and select Disk Management from the menu. Your new drive should appear as “Unallocated” space in the lower portion of the window.
Right-click the new drive’s description (not the unallocated space bar) and select “Initialise Disk.” Choose GPT (GUID Partition Table) as the partition style. GPT supports drives larger than 2 TB and provides better data protection than the older MBR format.
Step 3: Create and Format a New Volume
Right-click the unallocated space bar representing your new drive and select “New Simple Volume.” The New Simple Volume Wizard will launch to guide you through the process.
Accept the default settings to use all available space unless you want to create multiple partitions. Select NTFS as the file system, which offers the best compatibility with Windows and supports large files common in gaming and content creation.
Assign a drive letter that’s easy to remember. Many users prefer letters like G: for “Games” or D: for “Data” to make the purpose obvious. Enter a volume label that clearly identifies the drive’s purpose.
Complete the wizard and wait whilst Windows formats the new drive. This process typically completes in seconds for NVMe drives due to their fast write speeds.
Optimising NVMe Performance in HP OMEN Laptops
Proper configuration ensures your new NVMe drive delivers maximum performance throughout its lifespan.
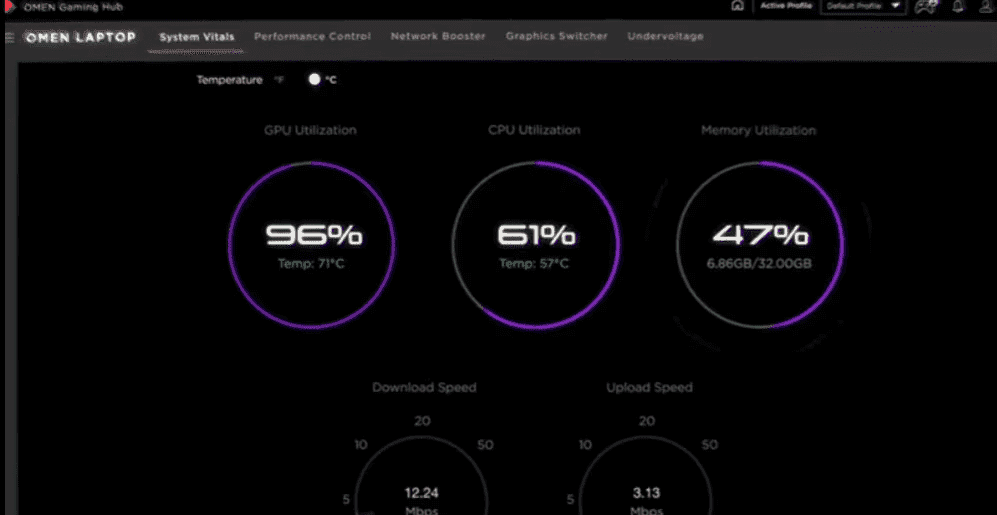
Utilise HP OMEN Gaming Hub
The HP OMEN Gaming Hub provides comprehensive monitoring and optimisation tools specifically designed for gaming laptops. Access the storage monitoring section to track your drive’s health status, current temperature, and remaining lifespan.
Enable performance mode within OMEN Gaming Hub to ensure your system delivers maximum power to storage devices during gaming sessions. This prevents thermal or power throttling that could reduce drive performance.
Configure Game Library Locations
Modern gaming platforms including Steam, Xbox Game Pass, and Epic Games Store allow you to specify installation locations for new games. Access each platform’s settings and add your new drive as a game library location.
For Steam, navigate to Settings > Downloads > Steam Library Folders and click “Add Library Folder” to select your new drive. For Xbox Game Pass, open the Xbox app, access Settings > General > Change where this app installs games.
Installing new games to your faster secondary drive whilst maintaining your operating system on the primary drive provides optimal performance for both gaming and everyday computing tasks.
Enable Write Caching
Write caching improves perceived performance by allowing Windows to confirm write operations are complete before data physically writes to the drive. Open Device Manager, expand the “Disk drives” section, and double-click your new NVMe drive.
Navigate to the Policies tab and enable “Enable write caching on the device” if not already selected. Consider enabling “Turn off Windows write-cache buffer flushing on the device” for additional performance, but understand this carries a small risk of data loss during unexpected power failures.
Maintain Current Firmware
Periodically visit the drive manufacturer’s website to check for firmware updates. These updates often improve performance, fix bugs, and enhance compatibility with new hardware and software. Australian users should verify they’re downloading firmware from official sources to avoid potential security risks.
Follow the manufacturer’s specific instructions for applying firmware updates, as the process varies between brands. Never interrupt a firmware update process, as this can permanently damage the drive.
Troubleshooting Common Installation Issues
Even with careful preparation, you may encounter issues during or after installation. These solutions address the most common problems Australian users experience.
Drive Not Detected in BIOS
If your new drive doesn’t appear in BIOS, the most common cause is incomplete seating in the M.2 slot. Power down completely, remove the bottom panel again, and verify the drive is fully inserted with the gold contacts completely engaged in the slot connector.
Check that the mounting screw is properly tightened, as an unsecured drive may not maintain proper electrical contact. If your HP OMEN laptop has multiple M.2 slots, try installing the drive in a different slot to rule out a faulty connector.
Verify the drive itself functions correctly by testing it in another compatible system if available. Rarely, drives can be dead on arrival and require replacement under warranty.
Windows Not Recognising the New Drive
If the drive appears in BIOS but not in Windows File Explorer, it likely requires initialisation as described in the post-installation setup section. Open Disk Management to verify the drive’s presence and status.
If Disk Management shows the drive as “Unknown” or “Not Initialised,” right-click and select “Initialise Disk,” then create a new volume as previously described. This process is normal for brand-new drives and doesn’t indicate any problem.
Performance Below Specifications
If your new drive isn’t delivering expected performance, verify it’s installed in a slot supporting its maximum speed. A PCIe Gen 4 drive installed in a Gen 3 slot will operate at Gen 3 speeds, approximately half the drive’s rated performance.
Update your laptop’s chipset drivers from the HP Support website. Outdated drivers can significantly impact NVMe performance. After updating, restart your system and test performance again using free benchmarking tools like CrystalDiskMark.
Overheating and Thermal Throttling
Modern NVMe drives can generate substantial heat during sustained operations, particularly during large file transfers or game installations. If you notice performance degradation after initial good results, thermal throttling may be occurring.
Monitor temperatures using HP OMEN Gaming Hub’s system monitoring tools. If the drive consistently exceeds 70°C during normal use, improve cooling by ensuring your laptop’s ventilation isn’t obstructed. Clean dust from cooling vents using compressed air, being careful not to spin fans at high speed.
Consider adding or upgrading thermal pads between the drive and the laptop’s bottom panel if not already present. Some users in particularly hot Australian climates may benefit from using a laptop cooling pad to improve overall system airflow.
Unexpected Error Messages or System Instability
Blue screen errors, boot failures, or random crashes after installing a new NVMe drive often indicate driver or compatibility issues rather than hardware problems. Update your laptop’s BIOS to the latest version available from HP Support, as BIOS updates frequently include improved storage controller compatibility.
Verify Windows is fully updated through Settings > Update & Security > Windows Update. Install all available updates including optional driver updates for storage controllers.
If problems persist, try disconnecting the new drive and operating from your original drive only. If stability returns, the issue likely relates to the new drive or its configuration rather than coincidental system problems.
Storage Maintenance and Best Practices for Long-Term Performance
Proper maintenance extends your NVMe drive’s lifespan and ensures consistent performance throughout years of use.
Regular Health Monitoring
Utilise HP OMEN Gaming Hub to regularly check your drive’s health status. Modern NVMe drives report SMART (Self-Monitoring, Analysis, and Reporting Technology) data including total data written, remaining lifespan percentage, and error counts.
Schedule monthly health checks to identify potential issues before they cause data loss or system failures. Most consumer NVMe drives are rated for hundreds of terabytes of writes, providing years of reliable service under typical gaming and content creation workloads.
Capacity Management
Avoid filling any SSD beyond 75-80% of its total capacity. When drives approach full capacity, performance degrades noticeably as the controller struggles to find empty blocks for new data. Additionally, completely full drives cannot perform garbage collection and wear levelling operations effectively, accelerating wear and reducing lifespan.
If your drive regularly approaches capacity, consider archiving older games you’re not actively playing to external storage or cloud services. Most modern games can be reinstalled quickly when needed, especially for Australian users with NBN or other high-speed internet connections.
Strategic Data Placement
Store frequently accessed files and applications on your fastest NVMe drive. This includes your operating system, productivity software, and currently played games. Move static media files like photo libraries, completed video projects, and archived documents to secondary storage.
For content creators working with large video files, consider installing editing software and current projects on your NVMe drive whilst storing completed projects and raw footage on external storage. This approach maximises performance where it matters whilst preserving precious NVMe capacity for active work.
External Storage for Long-Term Archives
Australian users with extensive game libraries spanning older titles should consider supplementing internal NVMe storage with external solutions. USB 3.2 Gen 2 external SSDs provide excellent performance for games that don’t require absolute maximum loading speeds, whilst traditional external hard drives serve well for media archives and backups.
This tiered storage approach maximises the value of your premium internal NVMe capacity by reserving it for applications where performance truly matters.
Exploring Additional HP OMEN Gaming Solutions
Upgrading storage represents just one aspect of optimising your gaming experience. HP offers comprehensive solutions for Australian gamers seeking to enhance every aspect of their setup.
HP OMEN Desktop Gaming Systems
For users seeking maximum expandability and the ultimate in gaming performance, explore the HP OMEN 25L Gaming Desktop. Desktop systems provide tool-less access to internal components, support for multiple full-size NVMe drives, and superior cooling performance compared to laptop form factors.
Desktop systems also offer straightforward upgradability for other components including graphics cards, memory, and processors. This flexibility ensures your investment remains current for longer periods without requiring complete system replacement.
HP OMEN Gaming Monitors
Pair your upgraded storage with immersive displays designed specifically for gaming. The HP OMEN 27 inch QHD 240Hz Gaming Monitor delivers buttery-smooth gameplay with incredibly high refresh rates, ensuring you experience your games at their visual best.
High refresh rate monitors complement fast NVMe storage by eliminating waiting times throughout your gaming experience. From launching games to loading levels, every aspect feels instantaneous and responsive.
HP Gaming Accessories
Complete your gaming setup with purpose-built peripherals designed to enhance your competitive edge. Browse the comprehensive range of HP Gaming Accessories including precision mice, mechanical keyboards, and immersive headsets.
Quality peripherals transform your gaming experience just as dramatically as storage upgrades, providing the responsiveness and comfort needed for extended gaming sessions.
Conclusion: Maximising Your HP OMEN Laptop’s Potential
For Australian gamers and content creators, upgrading storage with an NVMe drive represents one of the most impactful enhancements you can make to your HP OMEN laptop. The installation process, whilst requiring careful attention to detail, is straightforward and accessible to users comfortable with basic hardware modifications.
The benefits manifest immediately after installation: dramatically faster boot times, near-instantaneous game launches, and seamless multitasking between demanding applications. You’ll no longer face difficult decisions about which games to delete to make room for new releases, and you’ll spend more time actually playing rather than waiting for loading screens.
This comprehensive guide has equipped you with everything needed to successfully expand your HP OMEN laptop’s storage capacity. From understanding the technical differences between storage technologies to navigating model-specific slot configurations, from careful installation procedures to post-installation optimisation, you now possess the knowledge to confidently upgrade your system.
Remember to always prioritise safety by grounding yourself properly, using appropriate tools, and handling all components gently. Verify compatibility before purchasing components, back up critical data before beginning work, and don’t hesitate to seek professional assistance if you’re uncertain about any step.
If you’re ready to explore additional ways to optimise your HP OMEN gaming experience, HP offers extensive resources specifically for Australian users. Browse the complete range of HP OMEN Laptops, explore Victus Gaming Laptops for budget-conscious options, or visit HP Support for drivers, troubleshooting assistance, and warranty information. Understanding your HP OMEN laptop’s internal layout ensures you select compatible components and maximise your upgrade investment.
Ready to expand your gaming horizons? Shop HP OMEN Gaming Laptops now and discover the perfect balance of performance, upgradeability, and value for Australian gamers.
Recent Posts


Popular Posts


Products purchased through this store are sold and fulfilled by Ingram Micro Pty Limited
CONTACT US
Call us
- Sales
- 1300 540 516
- Technical support
- 13 23 47
Exc. public holidays
Chat with us
- Our specialist are here to help
- Live Product Demo
- Sales
- 61288061500 (WhatsApp)
-
- Post Sales
- 61288061700(WhatsApp)
Exc. public holidays
Live product demo
Submit feedback
We value your opinion!