Thank you for visiting the AUSTRALIA HP Store
-
Contact Us
CONTACT USCall us
- Sales (Home, Students, Gamers)
- 1300 540 516
- Sales (Small Business Customers)
- 1800 891 209
- Post-Sales
- 13 23 47
- Technical support
- 13 10 47
Exc. public holidays
Chat with us- Our specialist are here to help
- Live Product Demo
- Sales
- 61288061500 (WhatsApp)
-

- Post Sales
- 61288061700(WhatsApp)
- Technical Support
- 61341594000(WhatsApp)
Exc. public holidays
Live product demo
Submit feedback We value your opinion! - My Account
Search
Complete Desktop Case Swap Guide for Custom PC Builds

Posted:
June 27, 2025
For many Australian PC enthusiasts, there comes a time when the urge to personalise your desktop system extends beyond software tweaks and RGB lighting profiles. Whether you’re looking to accommodate advanced cooling solutions for those hot Queensland summers, showcase your components through tempered glass panels, improve airflow for better performance, or simply express your personal aesthetic through modern case designs, a case swap can breathe new life into your existing system.
Many pre-built desktops from HP’s gaming desktop and business desktop ranges provide excellent foundations for customisation, offering powerful components in well-designed packages. This comprehensive guide will walk you through the process of transferring your desktop components to a new chassis, from initial planning to final assembly, with considerations specific to the Australian market.
Important Disclaimer: Any modifications to your original desktop system, including opening the case or transferring components, may void your warranty. Please review your warranty terms or contact HP support for specific details before proceeding. Australian Consumer Law provides certain guarantees that cannot be excluded, but modifications may affect your manufacturer’s warranty coverage.
Contents
- Pre-Swap Planning: Tools, Compatibility, and Preparation
- Step-by-Step Disassembly of Your Desktop
- Pre-Built Desktop Considerations
- Preparing Your New Case
- Component Transfer Process
- Post-Transfer Steps and Troubleshooting
- Upgrading vs. Case Swapping: Making the Right Choice
- Conclusion: Enjoying Your Newly Housed System
Pre-Swap Planning: Tools, Compatibility, and Preparation
Essential Tools for Your Case Swap
Before beginning your case transfer, gather these essentials that are readily available from Australian electronics retailers:
- Phillips screwdriver set (various sizes for different components)
- Anti-static wrist strap or grounding mat
- Cable ties for organisation
- Small container for screws and hardware
- Compressed air for cleaning components
- Smartphone or camera for documentation
- Thermal paste (if remounting CPU cooler)
- Torch or adequate lighting for dark spaces
Selecting a Compatible Replacement Case
The most critical consideration when selecting a new case is motherboard compatibility. Australian retailers stock cases in various form factors to suit different builds:
- Identify your motherboard form factor: Check if you have ATX, micro-ATX (mATX), or mini-ITX
- ATX cases are the most versatile and accommodate ATX, micro-ATX, and mini-ITX boards
- Micro-ATX cases will fit micro-ATX and mini-ITX motherboards
- Mini-ITX cases only accommodate mini-ITX motherboards
Pro Tip: Research your specific desktop model or open your case to confirm the exact motherboard size before purchasing a new case. Pre-built systems commonly use micro-ATX form factors.
Beyond motherboard compatibility, consider these factors important for Australian conditions:
- Cooling clearance: Ensure adequate space for your CPU cooler and GPU, especially important during Australian summers
- Drive bays: Confirm sufficient mounting points for your storage devices
- Front I/O compatibility: Check if the new case’s front panel connectors match your motherboard’s headers
- PSU form factor: Verify the power supply mounting area accommodates your PSU (standard ATX vs. SFX)
- Ventilation: Consider cases with good airflow characteristics for Australia’s climate
Warranty Considerations
Before proceeding with any case swap, understand the warranty implications:
- Opening your desktop case may void your manufacturer’s warranty
- Transferring components to a new case will likely void your manufacturer’s warranty
- Any damage occurring during the transfer will not be covered
- Under Australian Consumer Law, you still have certain consumer guarantees, but modifications may affect manufacturer warranty claims
If your system is still under warranty and you’re experiencing issues, consider contacting HP support before attempting a case swap.
Workspace Preparation and Safety
Set up a proper workspace and take necessary precautions:
- Choose a spacious, well-lit area with a clean, flat surface
- Back up all important data to external storage or cloud services
- Power down the system completely and unplug all cables
- Wait at least 30 minutes after powering down to allow capacitors to discharge
- Ground yourself properly by wearing an anti-static wrist strap or regularly touching a grounded metal object
- Avoid working on carpeted surfaces which can generate static electricity
- Ensure adequate ventilation in your workspace
Step-by-Step Disassembly of Your Desktop
Documenting Your Original Setup
Before removing a single screw:
- Take clear photos of all cable connections from multiple angles
- Label cables with tape or stickers if necessary
- Note the orientation of components like fans and the power supply
- Document screw locations, especially if different types or lengths are used
- Record fan directions and airflow patterns
This documentation will prove invaluable during reassembly and if you ever need to return the system to its original state.
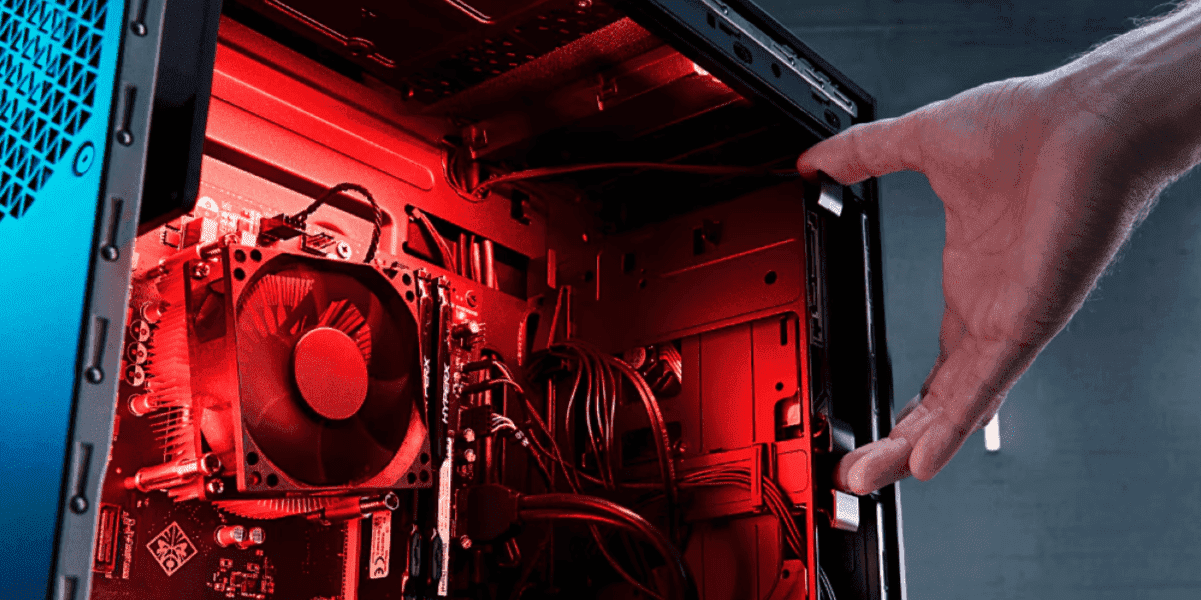
Accessing the Internals
- Power down and unplug all cables from your desktop
- Locate the side panel screws (typically near the rear of the case)
- Remove the Phillips head screws securing the side panel
- Slide the panel backward and lift it away from the chassis
- If working with an HP pre-built system, consult your specific model’s documentation for panel removal
Component Removal in the Correct Sequence
For a smooth disassembly process, remove components in this order:
1. Graphics Card and Expansion Cards
- Disconnect any power cables from your graphics card
- Remove any GPU support brackets if present
- Unscrew the PCIe slot bracket at the rear of the case
- Release the PCIe slot retention clip at the end of the slot
- Gently pull the card straight up and out of the PCIe slot
- Remove any other expansion cards using the same process
2. Storage Devices
- Disconnect data and power cables from all drives
- Remove any drive mounting screws or release drive tray clips
- Slide HDDs and SSDs out of their respective bays
- Note the drive configuration for reinstallation in the new case
- Keep track of which drive is your boot drive
3. Front Panel and Peripheral Connections
- Locate and disconnect all front panel headers (power, reset, LEDs)
- Disconnect USB headers from the motherboard
- Remove audio headers and any other front panel connections
- Take photos of header locations on the motherboard before disconnection
- Label each connector if possible for easier reassembly
4. Cooling System
- Disconnect fan power cables from the motherboard
- Remove any fan mounting screws and extract case fans
- If transferring the CPU cooler, disconnect its power cable
- For liquid coolers, remove any radiator mounting screws carefully
- For air coolers, release the mounting brackets from the motherboard
- Handle cooling components carefully to avoid damage
5. Power Supply
- Disconnect the 24-pin motherboard power connector
- Disconnect the CPU power connector (typically 4-pin, 8-pin, or 4+4-pin)
- Disconnect all peripheral power cables (drives, fans, etc.)
- Remove the PSU mounting screws at the rear of the case
- Carefully slide the PSU out of the case
- If your PSU cables are modular, consider labelling them
6. Motherboard (with CPU and RAM)
- Ensure all cables are disconnected from the motherboard
- Remove all motherboard mounting screws (typically 6-9 screws)
- Gently lift the motherboard out of the case, being careful not to catch any remaining connectors
- It’s typically best to leave the CPU and RAM installed on the motherboard during transfer
- Support the motherboard from underneath while removing it
Pre-Built Desktop Considerations
When working with HP pre-built systems from the desktop range, be aware of these particular considerations:
Proprietary Components
Some pre-built models may include proprietary elements:
- Motherboard form factors that aren’t standard (mATX, ATX, or mini-ITX)
- Custom cooling solutions with non-standard mounting
- Specialised RGB controllers that may not work outside the original case
- Proprietary power connectors on some components
- Custom front panel headers with non-standard pinouts
If you encounter proprietary components, you may need to replace them with standard alternatives when moving to a new case. Check with HP support or Australian PC forums for compatibility information specific to your model.
BIOS and Firmware Considerations
Pre-built systems use specific BIOS configurations:
- The boot sequence may need adjustment in BIOS after the transfer
- Fan control settings might require reconfiguration
- RGB lighting controls may behave differently in a new case
- System monitoring settings may need updates
- Some HP systems may have specific power management settings
Cooling System Configurations
Pay special attention to cooling arrangements, particularly important for Australian conditions:
- AIO liquid coolers may have specific orientation requirements
- Fan directions should maintain the same airflow pattern in the new case
- CPU cooler clearance must be verified in the new chassis
- Custom cooling solutions may require adaptation for standard cases
- Consider upgrading cooling if moving from a restricted to more open case design
Preparing Your New Case
Before transferring components to the new case, prepare it properly:
Standoff Installation
- Identify the correct standoff positions for your motherboard form factor
- Install brass standoffs in the appropriate locations
- Verify alignment with your motherboard’s mounting holes
- Ensure proper grounding by checking that all standoffs are secure
- Remove any unnecessary standoffs that don’t align with mounting holes
Cable Management Planning
- Locate cable routing channels in the new case
- Plan paths for major cables (24-pin, CPU power, GPU power)
- Prepare cable ties and routing accessories
- Consider airflow patterns when planning cable routes
- Identify areas where you can hide excess cable length
Fan and Cooling Preparation
- Install case fans in their optimal positions
- Verify fan directions (intake at front/bottom, exhaust at rear/top)
- Connect fan splitters or controllers if needed
- Prepare radiator mounting points for liquid cooling systems
- Consider additional fans for improved airflow in Australia’s climate
Drive Bay and Expansion Slot Setup
- Configure drive cages for your storage devices
- Remove unnecessary drive bays if permitted by the case design
- Prepare expansion slot covers for your GPU and other cards
- Check front panel I/O connections match your motherboard’s headers
- Ensure adequate cable routing space near drive bays
Component Transfer Process
With both cases prepared, it’s time to transfer your components:
1. Power Supply Installation
- Orient the PSU correctly (fan typically facing down/outside)
- Align mounting holes with the case’s PSU bracket
- Secure with screws but don’t overtighten
- Route main cables through appropriate channels
- Consider cable extensions if your new case is larger
2. Motherboard Installation
- Install the I/O shield from your original case into the new case (or use the new case’s universal shield)
- Carefully lower the motherboard onto the standoffs
- Align the I/O ports with the I/O shield
- Secure all mounting screws firmly but not excessively tight
- Verify the motherboard sits flat against all standoffs
3. Front Panel and Connectivity
- Connect front panel headers to the appropriate motherboard pins
- Connect USB headers according to your documentation
- Attach audio connectors to the corresponding header
- Connect any additional front panel features (card readers, fan controllers)
- Double-check polarity on power and LED connections
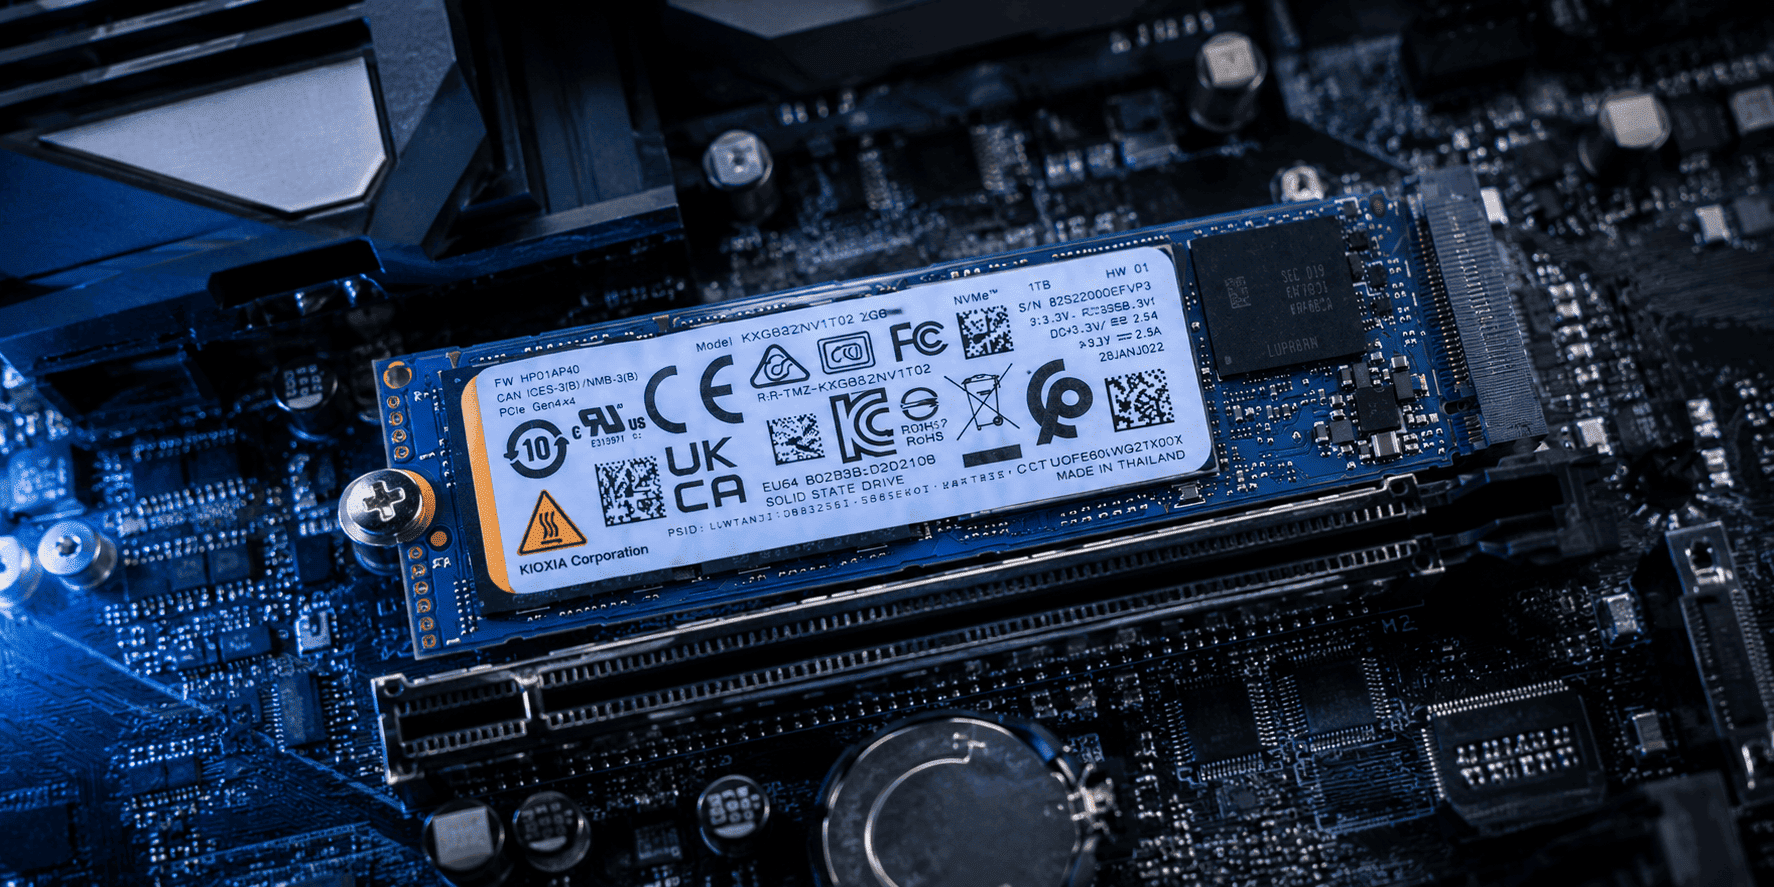
4. Storage Installation
- Mount HDDs in appropriate drive bays
- Secure SSDs in dedicated mounts or adapter brackets
- Connect SATA data cables to the motherboard
- Route and connect power cables from the PSU
- Ensure drives are firmly secured to prevent vibration
5. GPU and Expansion Card Installation
- Remove PCIe slot covers from the new case
- Align the GPU with the primary PCIe slot
- Insert the card firmly until the retention clip engages
- Secure the bracket with screws
- Install any additional expansion cards following the same process
- Connect GPU power cables if required
6. Cooling System Installation
- Install CPU cooler if it was removed
- Apply fresh thermal paste if remounting the cooler
- Mount case fans in optimal positions for airflow
- Install radiators for liquid cooling systems
- Connect all fan power cables to appropriate headers
7. Cable Management
- Connect the 24-pin motherboard power
- Attach CPU power connector(s)
- Connect GPU power cables if required
- Route and secure all cables with ties or Velcro straps
- Ensure no cables obstruct fans or airflow paths
- Use cable routing channels behind the motherboard tray
8. Final Connections and Verification
- Double-check all connections against your documentation
- Verify fan orientations for proper airflow
- Confirm all components are securely mounted
- Ensure no loose screws or tools remain inside the case
- Check that all power connectors are firmly seated
Post-Transfer Steps and Troubleshooting
Initial POST and Testing
- Connect peripherals (monitor, keyboard, mouse)
- Plug in the power cable and switch on the PSU
- Press the power button and observe for signs of life
- Check for all fans spinning and component LEDs
- Verify successful POST (Power-On Self Test)
- Enter BIOS to confirm all components are detected
Common Issues and Solutions
System Won’t Power On
- Check power connections: Verify 24-pin and CPU power are secure
- Confirm front panel connections: Ensure power button is correctly connected
- Test the power supply: Use the paper clip test if necessary
- Verify motherboard mounting: Check for shorts against the case
- Check PSU switch: Ensure the power supply switch is in the on position
Boot Device Not Found
- Check SATA connections: Ensure data and power cables are secure
- Verify boot priority: Enter BIOS and confirm correct boot device order
- Reset CMOS: Clear BIOS settings if necessary
- Check for damaged cables: Inspect for bent pins or damaged connectors
- Test drives individually: Connect drives one at a time to isolate issues
Overheating Issues
- Confirm proper fan operation: Verify all fans are spinning
- Check airflow direction: Ensure fans are oriented correctly
- Monitor temperatures: Use software like HWiNFO to check thermal readings
- Verify CPU cooler mounting: Check for proper contact and thermal paste application
- Consider ambient temperature: Account for Australia’s climate when assessing temperatures
Non-Functional Front Panel Ports
- Check header connections: Verify all front panel cables are correctly attached
- Inspect for damage: Look for bent pins on motherboard headers
- Test individual ports: Determine if all or only specific ports are affected
- Update drivers: Install appropriate chipset and USB drivers from HP’s support website
Reactivating Windows After Hardware Changes
Significant hardware changes may trigger Windows reactivation:
- Connect to the internet after completing your build
- Allow Windows to attempt automatic activation
- If prompted, use your Microsoft account or product key to reactivate
- For persistent issues, use the activation troubleshooter in Windows settings
- Contact Microsoft support if activation issues continue
For detailed guidance, see Microsoft’s guide to reactivating Windows after a hardware change.
Upgrading vs. Case Swapping: Making the Right Choice
Before committing to a case swap, consider whether upgrading to a new HP desktop might better serve your needs:
When to Choose a Case Swap
- Your current components meet your performance needs
- You want to improve aesthetics or cooling
- You enjoy hands-on technical projects
- Your system is out of warranty
- You have specific customisation goals
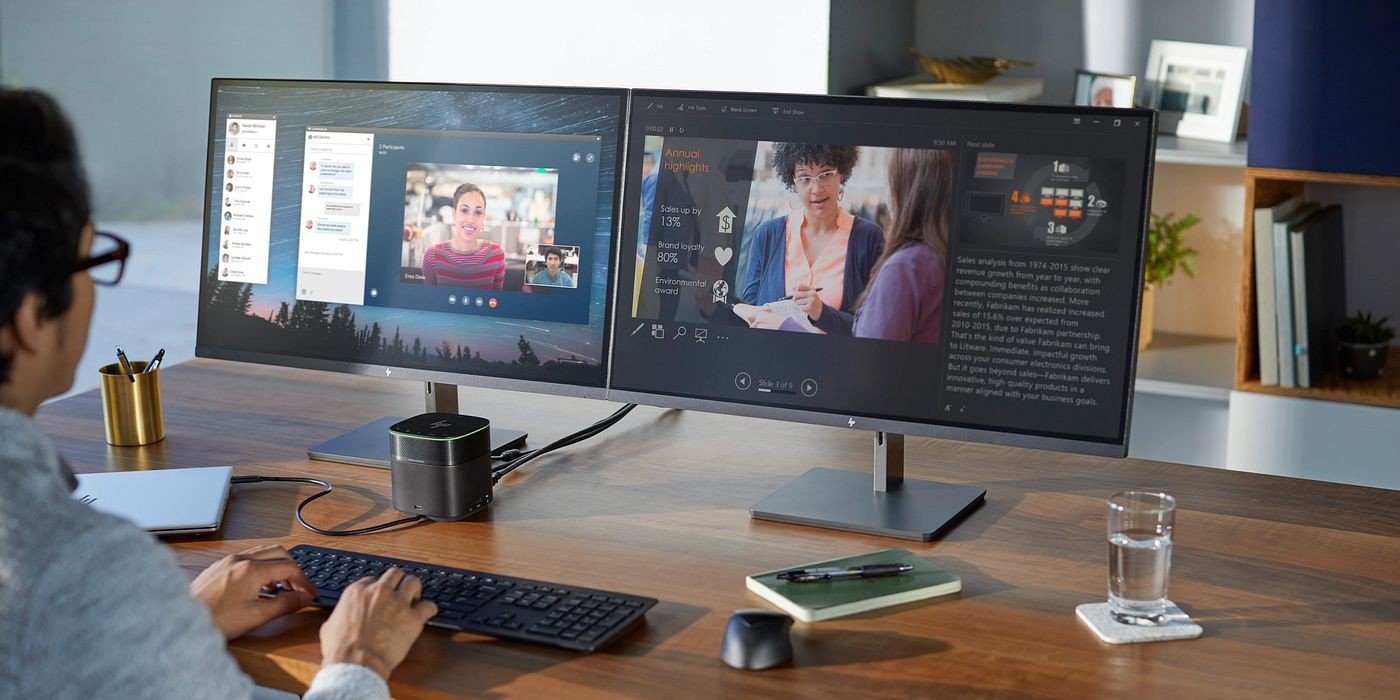
When to Consider a New HP Desktop
- Your current system struggles with modern applications
- You want the peace of mind of a full warranty
- You need the latest technology and features
- You prefer professionally assembled systems
- You want to avoid potential compatibility issues
Explore HP’s full range of desktop computers, gaming desktops, and business desktops to find the perfect system for your needs.
Conclusion: Enjoying Your Newly Housed System
Transferring your desktop components to a new case can be a rewarding project that extends the life and performance of your system whilst adding a personal touch to your setup. By following this guide and taking appropriate precautions, you can successfully complete the transfer whilst minimising risks.
Remember that this process will likely void your manufacturer’s warranty, so weigh the benefits against the potential drawbacks before proceeding. Whilst Australian Consumer Law provides certain guarantees that cannot be excluded, modifications may affect your manufacturer’s warranty coverage.
If you’re hesitant about performing a complete case swap, consider exploring HP’s range of desktops which offer excellent customisation options straight from the factory. Alternatively, consider smaller modifications to your existing case, such as adding RGB lighting or upgrading cooling components through HP’s accessories range.
With patience, proper documentation, and careful handling, your desktop will be ready to shine in its new home, offering improved aesthetics, better cooling suited to Australian conditions, or whatever benefits drew you to make the change in the first place. Whether you choose to swap cases or upgrade to a new HP desktop, you’ll have a system that meets your specific needs and performs reliably for years to come.
Recent Posts


Popular Posts


Products purchased through this store are sold and fulfilled by Ingram Micro Pty Limited
CONTACT US
Call us
- Sales (Home, Students, Gamers)
- 1300 540 516
- Sales (Small Business Customers)
- 1800 891 209
- Post-Sales
- 13 23 47
- Technical support
- 13 10 47
Exc. public holidays
Chat with us
- Our specialist are here to help
- Live Product Demo
- Sales
- 61288061500 (WhatsApp)
-
- Post Sales
- 61288061700(WhatsApp)
- Technical Support
- 61341594000(WhatsApp)
Exc. public holidays
Live product demo
Submit feedback
We value your opinion!