Thank you for visiting the NEW ZEALAND HP Store
-
Contact Us
CONTACT USCall us
- Sales
- 0800 854 848
- Technical support
- +64 9884 8600
Mon-Fri 9.00am - 6.00pm
(exc. Public Holidays)
Chat with us- Our specialist are here to help
- Live chat
Mon-Fri 9.00am - 6.00pm
(exc. Public Holidays)
Submit feedback We value your opinion! - My Account
Search
How to Set Up Your New Laptop: A Complete First-Day Checklist for Kiwis

Posted:
September 06, 2025
Categories:
Laptops

Setting up a new laptop properly from day one is crucial for optimal performance, security, and user experience. Whether you’ve invested in a quality HP laptop for work, study, or entertainment in New Zealand, following a systematic setup process ensures you get the most value from your investment whilst establishing proper security and backup protocols from the start.
This comprehensive guide covers everything from safe unboxing procedures to advanced security configurations, performance optimisation, and HP-specific features. By following these step-by-step instructions, you’ll transform your new laptop into a personalised, secure, and efficiently running machine tailored to your specific needs as a Kiwi user.
Setup Timeline: Complete initial setup takes 2-4 hours depending on internet speed and software installation choices. Essential security and performance steps can be completed in 30-45 minutes.
Contents
- Phase 1: Unboxing and Physical Setup
- Phase 2: Initial Windows 11 Setup
- Phase 3: Network and Internet Configuration
- Phase 4: Essential Security Configuration
- Phase 5: Software Installation Strategy
- Phase 6: Performance Optimisation
- Phase 7: Backup and Recovery Setup
- Phase 8: HP-Specific Features and Optimisation
- Phase 9: Personalisation and Accessibility
- Phase 10: Final Verification and Testing
- Troubleshooting Common Setup Issues
- Conclusion: Your Laptop is Ready for New Zealand
Phase 1: Unboxing and Physical Setup
Proper Foundation for Your New Device
Starting with correct physical setup prevents damage and ensures optimal performance from your first boot, particularly important in New Zealand’s varied climate conditions.
Safe Unboxing Procedure
Step-by-Step Unboxing:
-
Prepare workspace: Choose a clean, stable surface with adequate lighting
-
Avoid sharp tools: Open packaging using designated tabs or careful finger pressure
-
Document contents: Take photos of packaging layout for warranty purposes
-
Gentle removal: Lift laptop by protective foam or plastic, never by the screen
Component Verification
Essential Items Checklist:
-
Laptop computer with protective covering
-
Power adapter and power cable (check for NZ power plug compatibility)
-
Documentation (warranty info, quick start guide)
-
Accessories (stylus, adapters, or dongles if included)
-
Regulatory information and safety documentation
Ergonomic Workspace Setup
Optimal Physical Environment:
-
Stable surface: Ensure desk/table can support laptop weight safely
-
Proper height: Screen should be at eye level to prevent neck strain
-
Good ventilation: Allow airflow around laptop vents (important in warmer NZ regions)
-
Power access: Position near electrical outlet for initial setup
-
External peripherals: Connect monitor, keyboard, mouse if using
Pro Tip: If using laptop screen only, consider a laptop stand to raise display to comfortable viewing height and improve cooling airflow—particularly beneficial during New Zealand's warmer months.
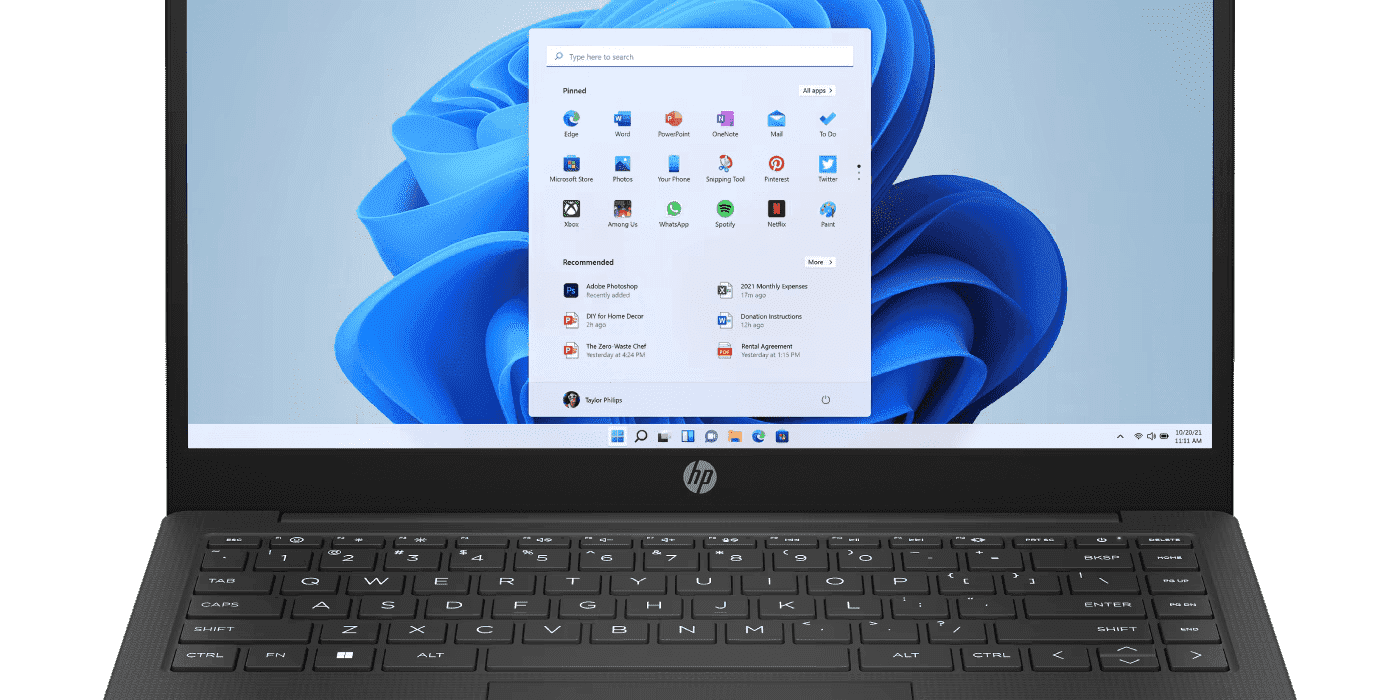
Phase 2: Initial Windows 11 Setup
Configuring Your Operating System Foundation
Windows 11 setup establishes your user account, privacy settings, and basic system configuration optimised for New Zealand users.
First Boot and Account Creation
Initial Startup Process:
-
Power on: Press power button and wait for Windows loading screen
-
Region selection: Choose New Zealand for proper localisation
-
Keyboard layout: Select your preferred keyboard configuration
-
Network connection: Connect to Wi-Fi or use Ethernet cable
Microsoft Account Configuration:
-
Existing account: Sign in with current Microsoft credentials for seamless sync
-
New account: Create account using secure email address and strong password
-
Local account option: Advanced users can create offline account (limited functionality)
Critical Privacy Settings
Essential Privacy Decisions:
| Setting | Recommendation | Impact |
|---|---|---|
| Location Services |
Disable unless needed
|
Protects location privacy
|
| Diagnostic Data |
Basic only
|
Reduces data sharing
|
| Tailored Experiences |
Disable
|
Prevents advertising personalisation
|
| Speech Recognition |
Disable unless using Cortana
|
Protects voice privacy
|
Windows 11 Interface Optimisation
Key Customisations:
-
Start Menu position: Centre (default) or Left alignment via Settings > Personalisation > Taskbar
-
Taskbar icons: Hide/show Search, Task View, Widgets, and Chat
-
Snap Layouts: Learn Windows + Z for productivity-enhancing window arrangements
-
Virtual Desktops: Windows + Tab for multiple workspace management
Phase 3: Network and Internet Configuration
Establishing Secure Connectivity
Proper network setup ensures reliable internet access whilst maintaining security standards—crucial for New Zealand’s varied internet infrastructure.
Wi-Fi and Ethernet Setup
Connection Priority:
-
Wired Ethernet: Most secure and stable (use if available)
-
Home Wi-Fi: WPA3 or WPA2 protected networks only
-
Public Wi-Fi: Avoid for initial setup; use with caution later
Network Security Best Practices:
-
Strong passwords: Use unique, complex Wi-Fi passwords
-
Network profiles: Set home network as “Private,” others as “Public”
-
Firewall configuration: Ensure Windows Defender Firewall is active
Browser Configuration
Essential Browser Setup:
-
Default browser selection: Edge (pre-installed) or install preferred alternative
-
Homepage configuration: Set to preferred starting page
-
Bookmark import: Transfer bookmarks from previous browser
-
Search engine: Configure preferred search provider
-
Privacy settings: Review and adjust tracking protection levels
Phase 4: Essential Security Configuration
Building a Secure Computing Environment
Security setup should be completed before installing additional software or accessing sensitive accounts, particularly important for business users.
Windows Security Hardening
Core Security Settings:
-
Windows Defender: Verify antivirus is active and up-to-date
-
Firewall: Confirm Windows Defender Firewall is enabled
-
SmartScreen: Enable app and browser protection
-
Account protection: Configure sign-in security options
Windows Hello Setup
Biometric Authentication (if available):
-
Fingerprint recognition: More convenient than face recognition
-
Face recognition: Requires compatible IR camera
-
PIN setup: Backup authentication method
-
Security keys: Enterprise-level security option
HP Wolf Security (HP Laptops)
Advanced Protection Features:
-
HP Sure Click: Isolates browser tabs in micro-virtual machines
-
HP Sure Sense: AI-powered malware detection
-
HP Sure Run: Protects critical security processes
-
HP Sure Recover: Secure system recovery capabilities
-
HP Sure View: Privacy screen technology (compatible models)
Activation Process:
-
Locate HP Wolf Security in Start Menu or HP folder
-
Follow setup wizard for initial configuration
-
Configure protection levels based on usage needs
-
Enable automatic updates for latest threat protection
Phase 5: Software Installation Strategy
Prioritised Application Deployment
Installing software in the correct order prevents conflicts and ensures optimal system performance, particularly important for New Zealand’s bandwidth considerations.
Installation Priority Order
Phase 1 - Security and Drivers:
-
Windows Updates: Complete all available updates first
-
HP Support Assistant: Install for driver management (HP laptops)
-
Updated drivers: Graphics, audio, networking drivers
-
Antivirus software: If replacing Windows Defender
Phase 2 - Essential Productivity:
-
Microsoft 365 or alternative office suite (LibreOffice, Google Workspace)
-
Web browsers: Chrome, Firefox, or preferred alternatives
-
Communication tools: Zoom, Microsoft Teams, Slack
-
Cloud storage: OneDrive, Google Drive, Dropbox clients
Phase 3 - Utilities and Tools:
-
Password manager: 1Password, Bitwarden, LastPass
-
File archiver: 7-Zip for compressed file handling
-
PDF reader: Adobe Acrobat Reader or alternative
-
Media players: VLC for comprehensive media support
HP Smart Start Service
Guided Setup Assistant: HP Smart Start provides personalised software recommendations and setup assistance specifically for HP laptops. It can help identify useful HP utilities and configure system-specific features for optimal performance.
Phase 6: Performance Optimisation
Maximising System Efficiency
Proper optimisation ensures your laptop runs efficiently and responsively from day one, crucial for New Zealand users who may have limited bandwidth for re-downloads.
Startup Management
Optimising Boot Performance:
-
Open Task Manager: Press Ctrl + Shift + Esc
-
Navigate to Startup tab: Review auto-starting applications
-
Disable unnecessary programs: Right-click and disable non-essential startup items
-
Keep essential items: Antivirus, Windows Security, hardware utilities
Bloatware Removal
Safe Software Cleanup:
-
Settings > Apps > Installed apps: Review pre-installed software
-
Identify bloatware: Trial software, unnecessary manufacturer apps
-
Uninstall safely: Remove unwanted programs (avoid system drivers)
-
Keep HP utilities: Preserve HP Support Assistant and hardware management tools
Power Management
Battery and Performance Balance:
-
Power mode selection: Settings > System > Power & battery
-
Balanced mode: Optimal for most users
-
Best performance: When plugged in and doing demanding tasks
-
Battery saver: Extends battery life when needed (useful for long commutes)
Phase 7: Backup and Recovery Setup
Protecting Your Data from Day One
Establishing backup procedures immediately protects against data loss and system failures—particularly important given New Zealand’s variable internet speeds for cloud backups.
Windows Backup Configuration
Built-in Backup Solutions:
-
File History: Settings > System > Storage > Advanced storage settings > Backup options
-
External drive: Use dedicated USB drive for regular backups
-
Schedule frequency: Set automatic daily or weekly backups
-
Folder selection: Include Documents, Pictures, Desktop, and custom folders
Cloud Storage Integration
Multi-Platform Backup Strategy:
-
OneDrive integration: Automatic with Microsoft account
-
Google Drive/Dropbox: Install desktop apps for folder syncing
-
Selective sync: Choose which folders to backup online
-
Bandwidth management: Set upload/download limits if needed (important for NZ data caps)
Recovery Drive Creation
Emergency Recovery Preparation:
-
USB drive requirement: 16GB USB drive for Windows 11
-
Creation process: Search “Create a recovery drive” in Windows
-
Include system files: Check option for complete recovery capability
-
Safe storage: Keep recovery drive in secure, accessible location
Phase 8: HP-Specific Features and Optimisation
Maximising HP Laptop Capabilities
HP laptops include specialised software and features that enhance performance and user experience, particularly valuable for premium laptop users.
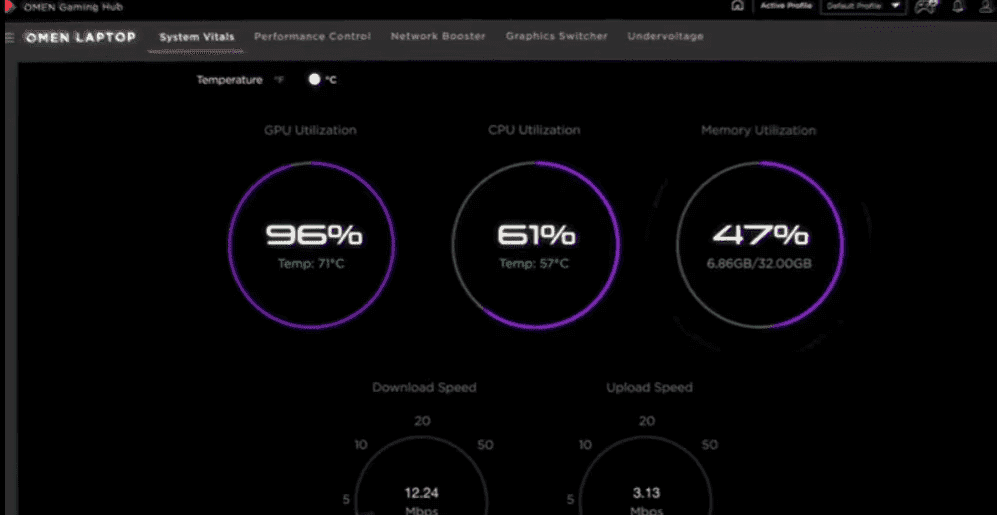
HP Command Centre
Centralised System Management:
-
Thermal profiles: Balance performance and cooling
-
Network booster: Prioritise specific applications for bandwidth
-
Battery health: Monitor and optimise battery longevity
-
System diagnostics: Built-in hardware testing tools
HP Audio and Display Enhancement
Premium Audio/Visual Experience:
-
Audio settings: Bang & Olufsen or DTS Audio optimisation
-
Display controls: Colour accuracy and brightness fine-tuning
-
Blue light filtering: Eye strain reduction for extended use
-
Audio profiles: Customise equaliser settings for different content types
HP Quick Drop and Connectivity
Seamless Device Integration:
-
HP Quick Drop setup: Download mobile app for file sharing
-
Device pairing: Connect laptop and smartphone via same network
-
File transfer: Drag-and-drop photos, videos, documents between devices
-
Cross-platform compatibility: Works with Android and iOS devices
Phase 9: Personalisation and Accessibility
Customising Your User Experience
Personalising your laptop improves productivity and comfort for daily use, with considerations for New Zealand’s diverse user needs.
Visual Customisation
Appearance Settings:
-
Desktop background: Settings > Personalisation > Background
-
Colour themes: Choose accent colours and light/dark mode
-
Taskbar configuration: Pin frequently used applications
-
Start Menu: Organise and pin essential apps
Accessibility Configuration
Universal Design Features:
-
Text scaling: Increase text size for better readability
-
High contrast: Improve visibility for users with visual impairments
-
Narrator: Built-in screen reader functionality
-
Magnifier: Zoom capabilities for detailed work
Notification Management
Minimising Distractions:
-
Settings > System > Notifications: Configure app notification permissions
-
Focus Assist: Automatic do-not-disturb during specific hours
-
Priority notifications: Allow only essential alerts
-
Notification history: Review missed notifications when convenient
Phase 10: Final Verification and Testing
Ensuring Complete Setup Success
Final checks confirm all systems are working properly and security measures are active, essential before beginning productive work in New Zealand’s competitive business environment.
System Health Verification
Comprehensive Testing:
-
Windows Updates: Confirm all updates installed
-
HP Support Assistant: Verify all drivers current
-
Security scan: Run full antivirus scan
-
Performance test: Launch demanding applications to test responsiveness
-
Hardware test: Verify all ports, cameras, audio, and wireless functions
Essential Keyboard Shortcuts
Productivity Shortcuts for New Users:
| Shortcut | Function | Use Case |
|---|---|---|
| Windows + D |
Show/hide desktop
|
Quick access to desktop icons
|
| Windows + L |
Lock computer
|
Security when stepping away
|
| Alt + Tab |
Switch between apps
|
Fast application switching
|
| Windows + V |
Clipboard history
|
Access multiple copied items
|
| Windows + S |
Search
|
Quick file and app searching
|
Ongoing Maintenance Schedule
Regular Maintenance Tasks:
-
Weekly: Run Windows Updates, clear browser cache
-
Monthly: Update HP Support Assistant, review startup programs
-
Quarterly: Clean temporary files, verify backup integrity
-
Annually: Review security settings, clean internal components
Troubleshooting Common Setup Issues
Resolving Initial Configuration Problems
Common Issues and Solutions:
Wi-Fi Connection Problems
Solutions:
-
Driver update: Install latest wireless drivers via HP Support Assistant
-
Network reset: Settings > Network & Internet > Advanced > Network reset
-
Router compatibility: Ensure router supports laptop’s wireless standards
Slow Performance
Solutions:
-
Background apps: Disable unnecessary startup programs
-
Storage space: Ensure adequate free disk space (minimum 15% free)
-
Power settings: Switch to balanced or high-performance mode
Security Software Conflicts
Solutions:
-
One antivirus only: Uninstall conflicting security software
-
Windows Defender: Ensure it’s active if no third-party antivirus installed
-
Firewall configuration: Verify Windows firewall is properly configured
Conclusion: Your Laptop is Ready for New Zealand
Congratulations! Your new laptop is now properly configured for optimal performance, security, and productivity in New Zealand’s dynamic digital environment. You’ve established a solid foundation that includes comprehensive security protection, efficient performance settings, personalised user experience, and reliable backup systems.
Setup Accomplishments
-
Security hardening: Multiple layers of protection active against evolving threats
-
Performance optimisation: System running efficiently with minimal bloatware
-
Backup systems: Data protection and recovery options configured for NZ internet conditions
-
HP features: Manufacturer-specific enhancements activated for maximum value
-
Personalisation: Customised interface for your workflow needs and preferences
Next Steps for Ongoing Success
-
Stay updated: Enable automatic updates for Windows and HP software
-
Regular maintenance: Follow monthly and quarterly maintenance schedules
-
Backup testing: Periodically verify backup and recovery procedures work effectively
-
Security awareness: Keep security software updated and remain vigilant about threats
-
Performance monitoring: Watch for changes in system performance over time
Additional Resources for New Zealand Users
Ongoing Support:
-
HP Support Website: Comprehensive drivers, manuals, and troubleshooting guides
-
Windows Support: Official Microsoft documentation and community forums
-
HP Command Centre: Ongoing system optimisation and monitoring
-
User communities: Online forums for tips, tricks, and troubleshooting help
-
Local support: HP New Zealand customer service for region-specific assistance
Remember: Technology evolves rapidly, so stay curious, keep learning, and maintain your system regularly to continue enjoying optimal performance from your new laptop investment. Whether you’re working from Auckland’s bustling CBD, studying from Christchurch’s campuses, or running a business from Wellington’s creative quarter, your properly configured HP laptop will serve as a reliable foundation for your digital endeavours.
Setup Note: Actual setup time varies based on internet speed, software choices, and customisation level. Essential security and performance setup typically requires 30-45 minutes, whilst complete personalisation may take several hours. New Zealand users should account for potential bandwidth limitations during cloud service setup and large software downloads.
Recent Posts


Popular Posts


Products purchased through this store are sold and fulfilled by Ingram Micro (NZ) LTD
CONTACT US
Call us
- Sales
- 0800 854 848
- Technical support
- +64 9884 8600
Mon-Fri 9.00am - 6.00pm
(exc. Public Holidays)
Chat with us
- Our specialist are here to help
- Live chat
Mon-Fri 9.00am - 6.00pm
(exc. Public Holidays)
Submit feedback
We value your opinion!