
Color Definition: Black: ![]()
Note: It may be helpful to print out these instructions before you start to replace the black print cartridge.
| Figure | Step |
|---|---|
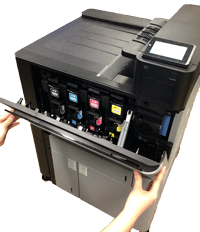
Figure 1: Open the front door
|
1. Open the front door. Make sure that the door is completely open. |
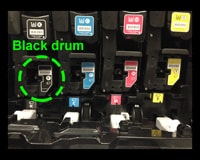
Figure 2: Locate the black image drum
|
2. Locate the black image drum. |
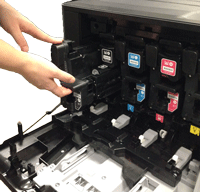
Figure 3: Release the black image drum
|
3. Lift the black image drum to release it from its slot. |
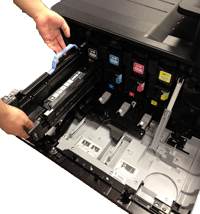
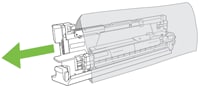
Figure 4: Pull the black image drum out
|
4. With one hand, slowly pull the black image drum out of the printer, while grasping the blue holder with your other hand as shown in Figure 4. Then put it on a clean level surface. CAUTION: Do not touch the green cylinder on the bottom of the image drum assembly because it can damage the drum. |
Figure 5: Unpack the new black image drum
|
5. Unpack the new black image drum from its protective bag. CAUTION: Do not shake the image drum. Do not touch the green cylinder on the bottom of the image drum assembly because it can damage the drum. NOTE: Store the used black image drum in the protective bag that came with the new black image drum. Information about recycling used image drums can be found on the image drum box. |
Figure 6: Align the black image drum
|
6. Make sure the black image drum is correctly aligned before trying to insert it into the slot. |
Figure 7: Insert the black image drum
|
7. Push the black image drum into its slot until it clicks into place. CAUTION: The gray protective cover on the bottom of the yellow image drum (not shown in Figure 7) automatically slides off as the image drum is inserted. You can discard this cover. |
Figure 8: Close the front door
|
8. Grasp the grips on both sides of the front door and lift until it clicks into place. |
![]()
Please let HP know if this helped you to resolve your issue, and help HP improve service.
![]()