Follow the steps listed below to print the two Diagnostics pages.
Note: It may be helpful to print out these instructions before you start to print the Diagnostics page.
| Figure | Step |
|---|---|
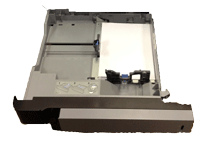
Figure 1: Load paper. 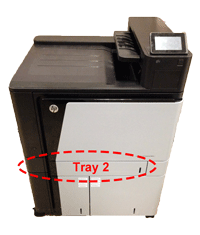
|
1. Load either 8.5 x 11-inch paper (letter) or A4 in Tray 2 of your printer as shown in Figure 1. |
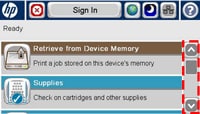
Figure 2: Home screen.
|
2. Go to the home screen on the touchscreen, then locate the scroll bar on right as shown in Figure 2. |
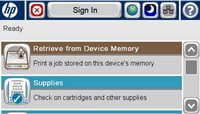
Figure 3: Touch Administration.
|
3. Touch the down arrow on the scroll bar to find ADMINISTRATION. Then touch ADMINISTRATION. |
Figure 4: Scroll bars.
|
4. There are now two scroll bars as shown in Figure 4. |
Figure 5: Touch Troubleshooting.
|
5. Touch the down arrow on the left scroll bar to find TROUBLESHOOTING. Then touch TROUBLESHOOTING. |
Figure 6: Touch Print Quality Pages.
|
6. Touch the down arrow on the left scroll bar to find PRINT QUALITY PAGES. Then touch PRINT QUALITY PAGES. |
Figure 7: Touch Diagnostics Page.
|
7. Touch the down arrow on the left scroll bar to find DIAGNOSTICS PAGE. Then touch DIAGNOSTICS PAGE. |
Figure 8: Touch Print.
|
8. Touch PRINT on the touchscreen to print the Diagnostics Page. |
Figure 9: Return to Ready state.
|
9. The printer returns to the Ready state after printing the Diagnostics page. Pick up the Diagnostics page, and return to your computer to continue the troubleshooting procedure. |


![]()
Please let HP know if this helped you to resolve your issue, and help HP improve service.
![]()