
Note: It may be helpful to print out these instructions before you start to remove the transfer unit.
| Figure | Step |
|---|---|
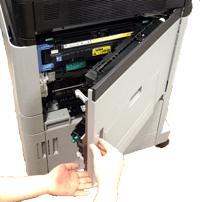
Figure 1: Open the right door
|
1. Open the right door. |
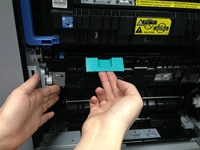
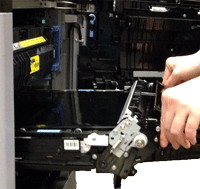
Figure 2: Open the panel
|
2. Lift the green handle on the transfer assembly to release it, and grasp the green handle and pull the transfer assembly directly toward yourself to open the panel. |
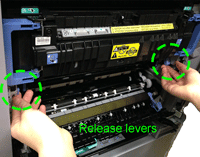
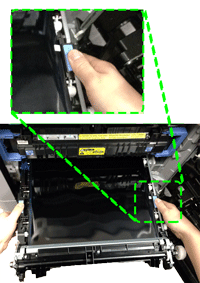
Figure 3: Unlock the ITB unit
|
3. Unlock the ITB unit by lifting the release levers as shown in the callout of Figure 3. |
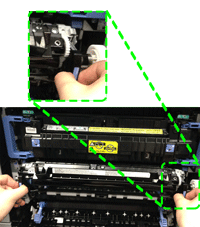
Figure 4: Grasp the handles and pull the ITB unit out 6 inches
|
4. Grasp the ITB handles as shown in the Figure 4 callout and then pull the ITB unit straight toward yourself about 6inches.
CAUTION: Be careful not to pull the ITB unit out too far. It is heavy and may fall suddenly when it comes free from the ITB slot. |
Figure 5: Switch your hands and remove the ITB unit
|
5. Switch your hands to the location of the blue tabs on both sides of the ITB unit as shown in Figure 5. CAUTION: Be careful not to drop the ITB unit when removing it. It is heavy and may fall suddenly when it comes free from the ITB slot. It weights 15 lbs. CAUTION: Do not touch the ITB unit or place anything on it. This may damage the transfer unit and cause print quality problems. |
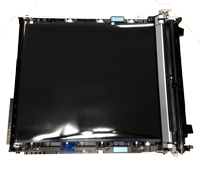
Figure 6: Put the ITB unit on a clean surface
|
6. Lift the ITB unit slightly and finish pulling it the rest of the way out and put it on a clean surface. CAUTION: Do not touch the shiny black surface of the belt on the top of the transfer unit, or place anything on it. This may damage the transfer unit and cause print quality problems. |
![]()
Please let HP know if this helped you to resolve your issue, and help HP improve service.
![]()