Note: It may be helpful to print out these instructions before you start to remove the secondary transfer roller.
| Figure | Step |
|---|---|
Figure 1: Open the right door
|
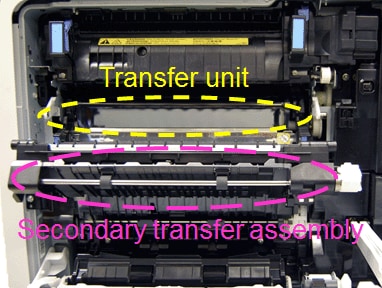
1. Open the right door. This will partially lower the secondary transfer assembly.
CAUTION: Do not touch the spongy roller surface unless you are replacing the roller. Skin oils on the roller can cause image quality problems. |
Figure 2: Lower the secondary transfer roller assembly
|
2. Push down on the blue lever as shown in Figure 2 to fully lower the secondary transfer assembly, and reveal the secondary transfer roller, as shown below.
|
Figure 3: Grasp the blue handle
|
3. Grasp the blue handle on the secondary transfer roller and lift it up, as shown in Figure 3. |
Figure 4: Grasp the black gear
|
4. Grasp the black gear at the other end of the secondary transfer roller and lift it up, as shown in Figure 4. |
Figure 5: Put the secondary transfer roller on a clean surface
|
5. Grasp the two ends of the secondary transfer roller, and carefully take it out of the printer. Put the secondary transfer roller on a flat clean surface, in a safe and protected location. CAUTION: Do not touch the spongy roller surface of the secondary transfer roller. Skin oils on the roller can cause image quality problems. |


![]()
Please let HP know if this helped you to resolve your issue, and help HP improve service.
![]()