Follow the steps listed below to print the PQ troubleshooting pages.
These pages consist of one procedure page and five color test pages.
- Print a copy of this Web page, and walk over to the printer you are troubleshooting.
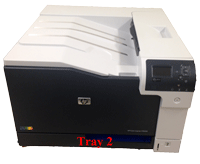
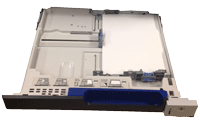
- Load either 8.5 x 11-inch paper (letter) or A4 in Tray 2
 of your printer.
- Press the Menu button
 to enter the Main Menu on the control panel of the printer.
<
to enter the Main Menu on the control panel of the printer.
< - Press the Down arrow button
 to highlight Administration menu, then press the OK button
  to select it.
- Press the Down arrow button to highlight Troubleshooting menu, then press the OK button to select it.
- Press the Down arrow button to highlight Print Quality Page menu, then press the OK button to select it.
- The Print PQ Troubleshooting Page menu should been highlighted by default. Press the OK button to select Print PQ Troubleshooting Page menu.
Note:The message PROCESSING JOB... displays on the control panel until the printer finishes printing the Diagnostics pages, then the printer returns to the Ready state.
- Pick up the PQ troubleshooting pages.
- Return to your computer to continue the troubleshooting procedure.
![]()
Please let HP know if this helped you to resolve your issue, and help HP improve service.
![]()