Note: It may be helpful to print out these instructions before you start to remove the fuser.
| Figure | Step |
|---|---|
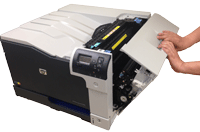
Figure 1: Open the right door
|
1. Open the right door. This will partially lower the secondary transfer assembly, and reveal the fuser as shown below.
CAUTION: The fuser might be hot. Do not touch the fuser other than by the blue handles. Do not touch the shiny black surface of the belt on the top of the ITB unit, or place anything on it. This may damage the ITB unit and cause print quality problems. |
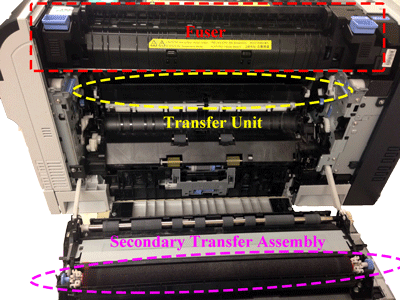
Figure 2: Locate the blue handles
|
2. Locate the blue handles as shown in Figure 2. |
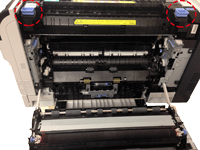
Figure 3: Grasp the blue handles
|
3. Grasp the blue handles on the fuser and squeeze the triggers, as shown in Figure 3. |
Figure 4: Pull the fuser out
|
4. Pull the fuser straight out. Put the fuser on a flat clean surface, in a safe and protected location. |


![]()
Please let HP know if this helped you to resolve your issue, and help HP improve service.
![]()