Figure
| Step |
Figure 1: Load Tray 1 with plain paper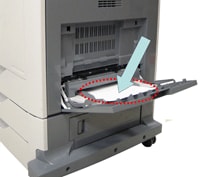
|
1. Load Tray 1  with either 8.5 x 11 inch (letter) paper or A4 size paper and adjust the
side guides . with either 8.5 x 11 inch (letter) paper or A4 size paper and adjust the
side guides .
|
Figure 2: Press Menu button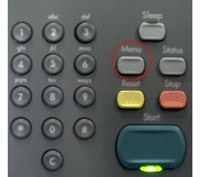
|
2. Press  button on the control panel of the printer to enter the MENUS. button on the control panel of the printer to enter the MENUS.
|
Figure 3: Touch DIAGNOSTICS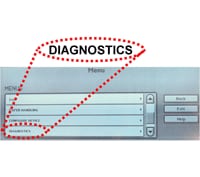
|
3. Scroll to find DIAGNOSTICS by touching the scrolling arrows on the touchscreen.
4. Touch DIAGNOSTICS on the touchscreen.
|
Figure 4: Touch CALIBRATE SCANNER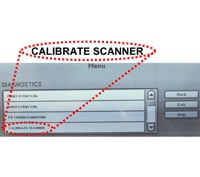
|
5. Scroll to find CALIBRATE SCANNER by touching the scrolling arrows on the touchscreen.
6. Touch CALIBRATE SCANNER on the touchscreen.
7. Touch OK on the touchscreen to print the first part of the calibration page .
|
Figure 5: Load Tray 1 with first part of calibration page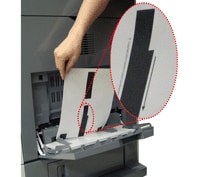
|
8. Load Tray 1 with the
page that just printed face-down so that the arrow is facing into the printer.
|
Figure 6: Scanner calibration page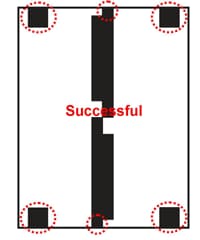
|
9. Touch OK on the touchscreen to print the rest of the calibration page . The scanner calibration page must look like Figure 6.
CAUTION: If the scanner calibration page does not look like the figure shown on the left, the calibration process will fail and the quality of scans will be degraded. The black areas must extend completely to the short edges of the page.
If they do not, use a black marker to extend the black areas to the edges of the page .
You will be using this page to perform the scanner calibration.
10. Check the scanner. Remove any paper on top of the
scanner glass
or stuck to the
bottom of the scanner lid .
11. Touch OK on the touchscreen to continue with the scanner calibration.
|
Figure 7: Load ADF with calibration page face-up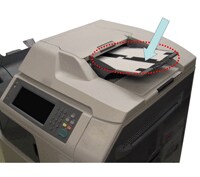
|
12. Load the ADF with the just printed scanner calibration page face-up and touch OK on the touchscreen.
|
Figure 8: Load ADF with calibration page face-down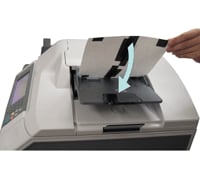
|
13. Load the ADF with the scanner calibration page face-down and touch OK on the touchscreen.
|
Figure 9: Place calibration page face-down on glass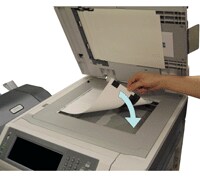
|
14. Place the scanner calibration page face-down on the scanner glass.
15. Close the scanner lid.
16. Touch OK on the touchscreen to finish the scanner calibration.
The control panel displays the message Scanner calibration successful to indicate success or the message Scanner calibration failed to indicate that the calibration failed. If the calibration failed, try calibrating the scanner again.
If the calibration continues to fail, contact HP.
|
